Getting started
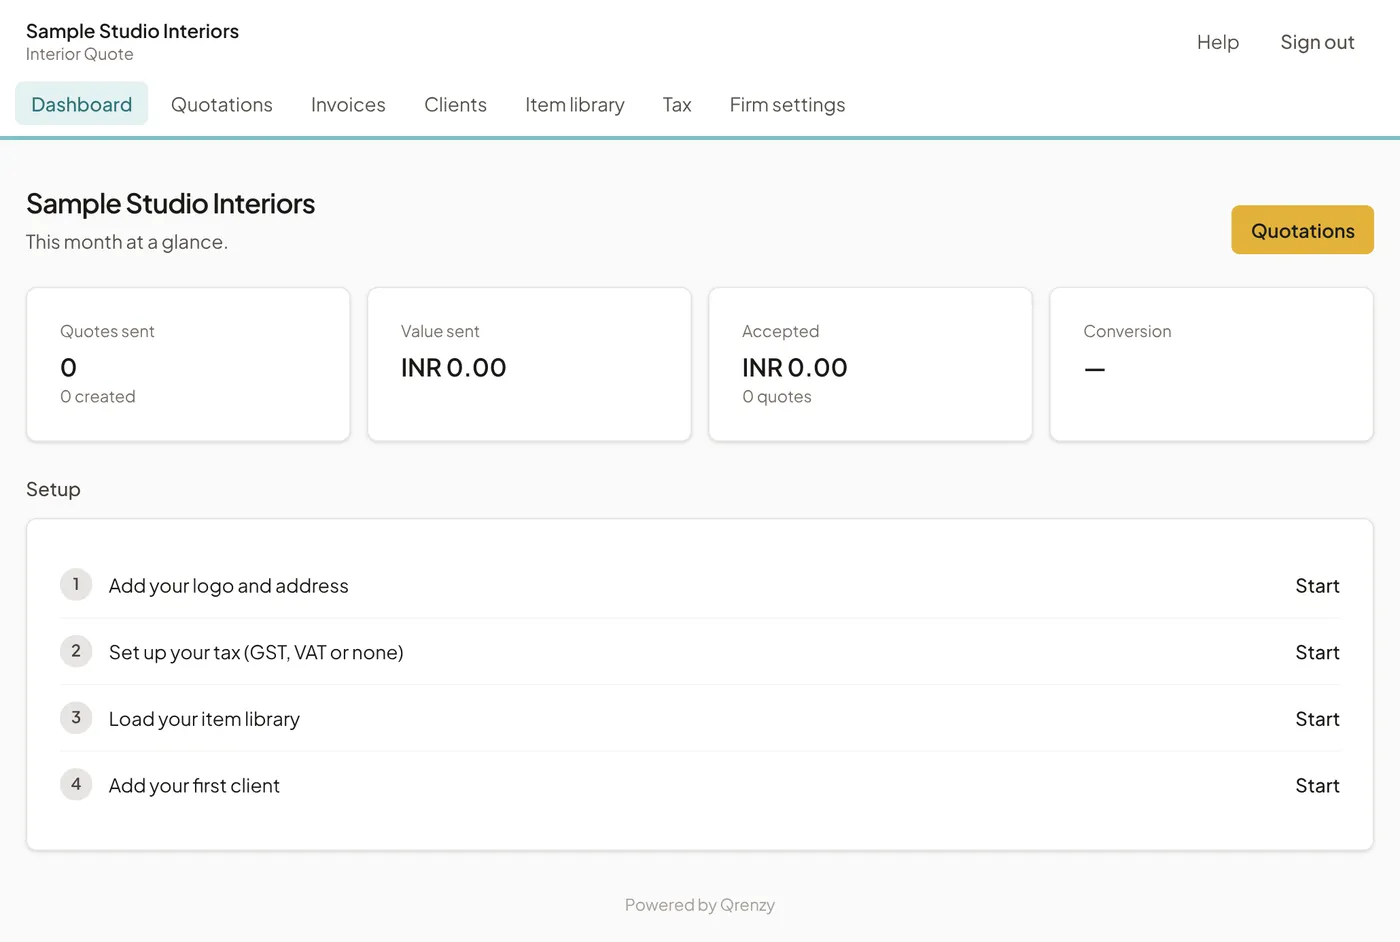
Ten minutes here means you never retype your logo, bank details or terms again: every quotation after this starts with them filled in. This guide walks through the setup checklist on your Dashboard screen, in order.
1. Sign in with your email
Go to interior-quote.qrenzy.com/app, enter your work email and choose Email me a sign-in code. There is no password. If you are new, signing in creates your account.
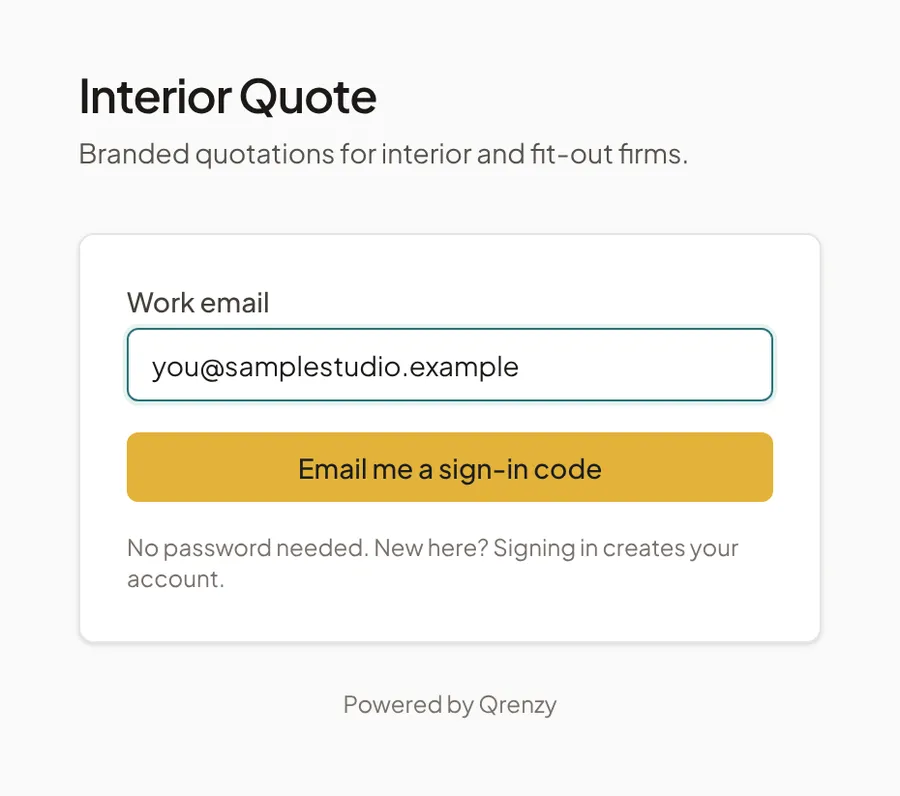
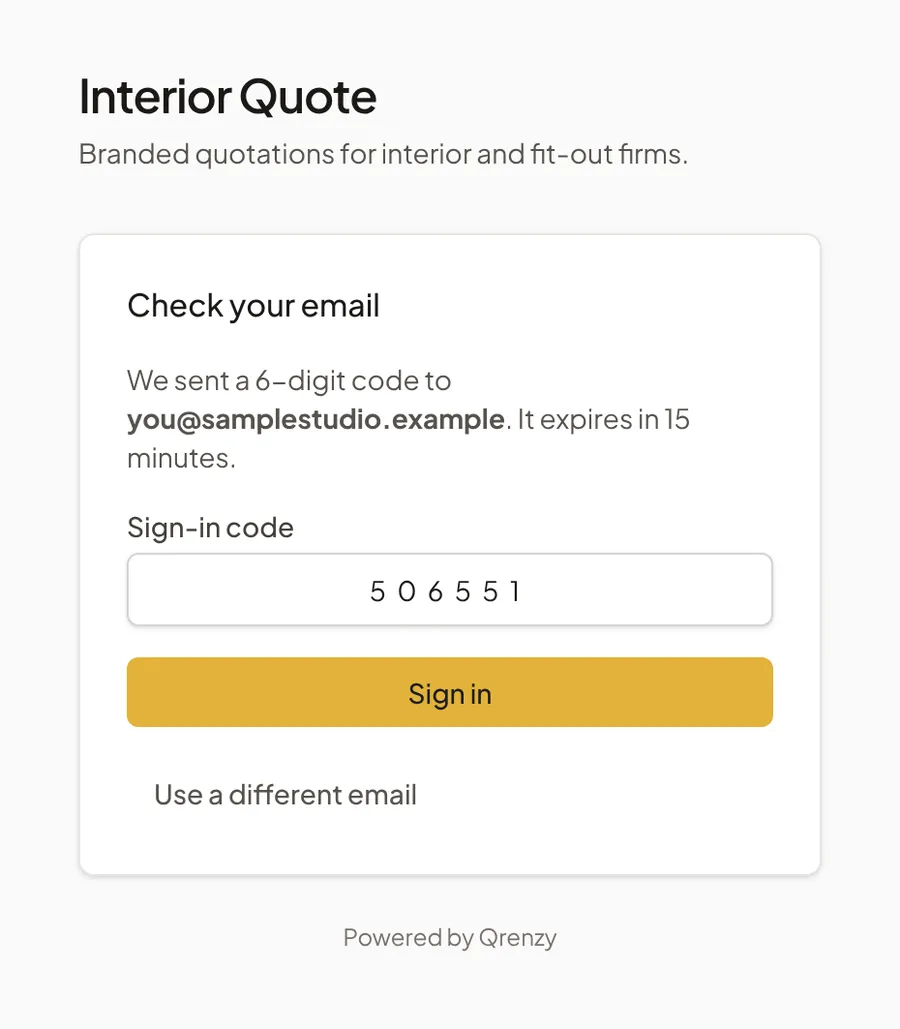
We email you a 6-digit code. Type it into Sign-in code and choose Sign in. The email also has a link that signs you in directly. Codes and links work for 15 minutes and only once. If the email does not arrive, check your spam folder, then use Use a different email to try again.
2. Set up your firm
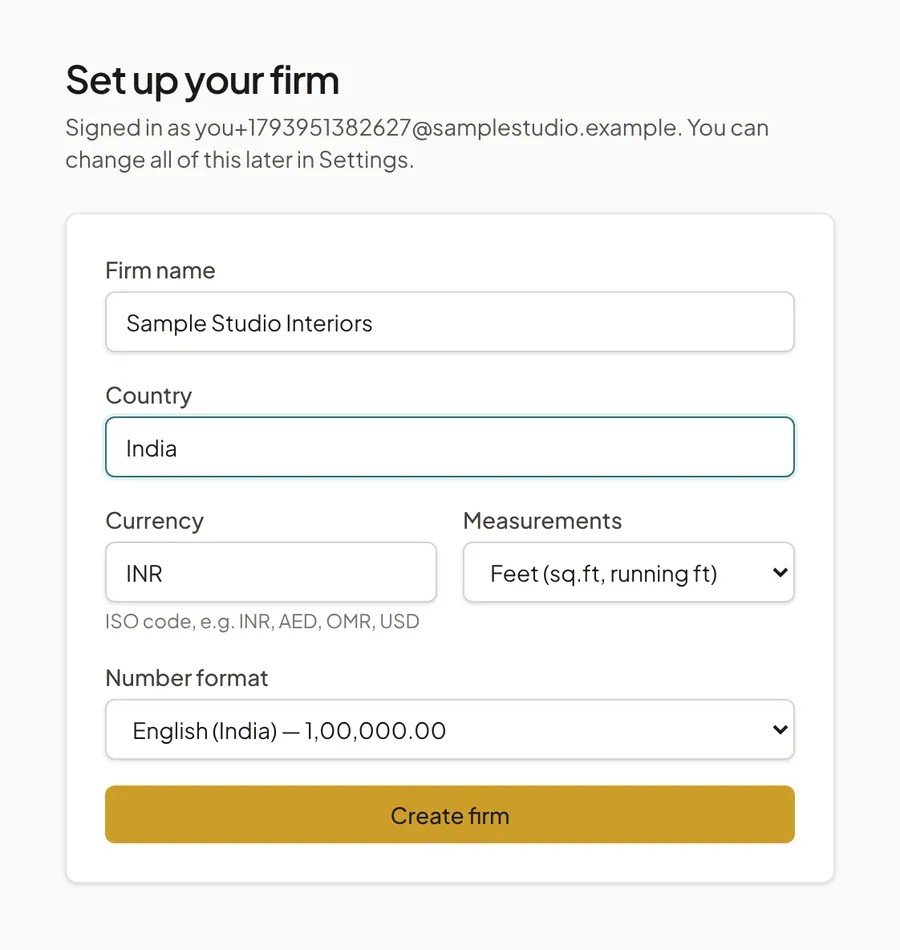
The first time you sign in, you are asked for four things:
- Firm name, as it should appear on your quotations.
- Country.
- Currency. Amounts use that currency’s own decimals: two for rupees and dirhams, three for Omani rials.
- Measurements: feet (sq.ft, running ft) or metres (sq.m, running m), and the Number format, for example 1,00,000.00 for Indian grouping.
After this you land on the Dashboard, which shows a short Setup checklist. The rest of this guide follows that list.
3. Add your logo, address, bank details and terms
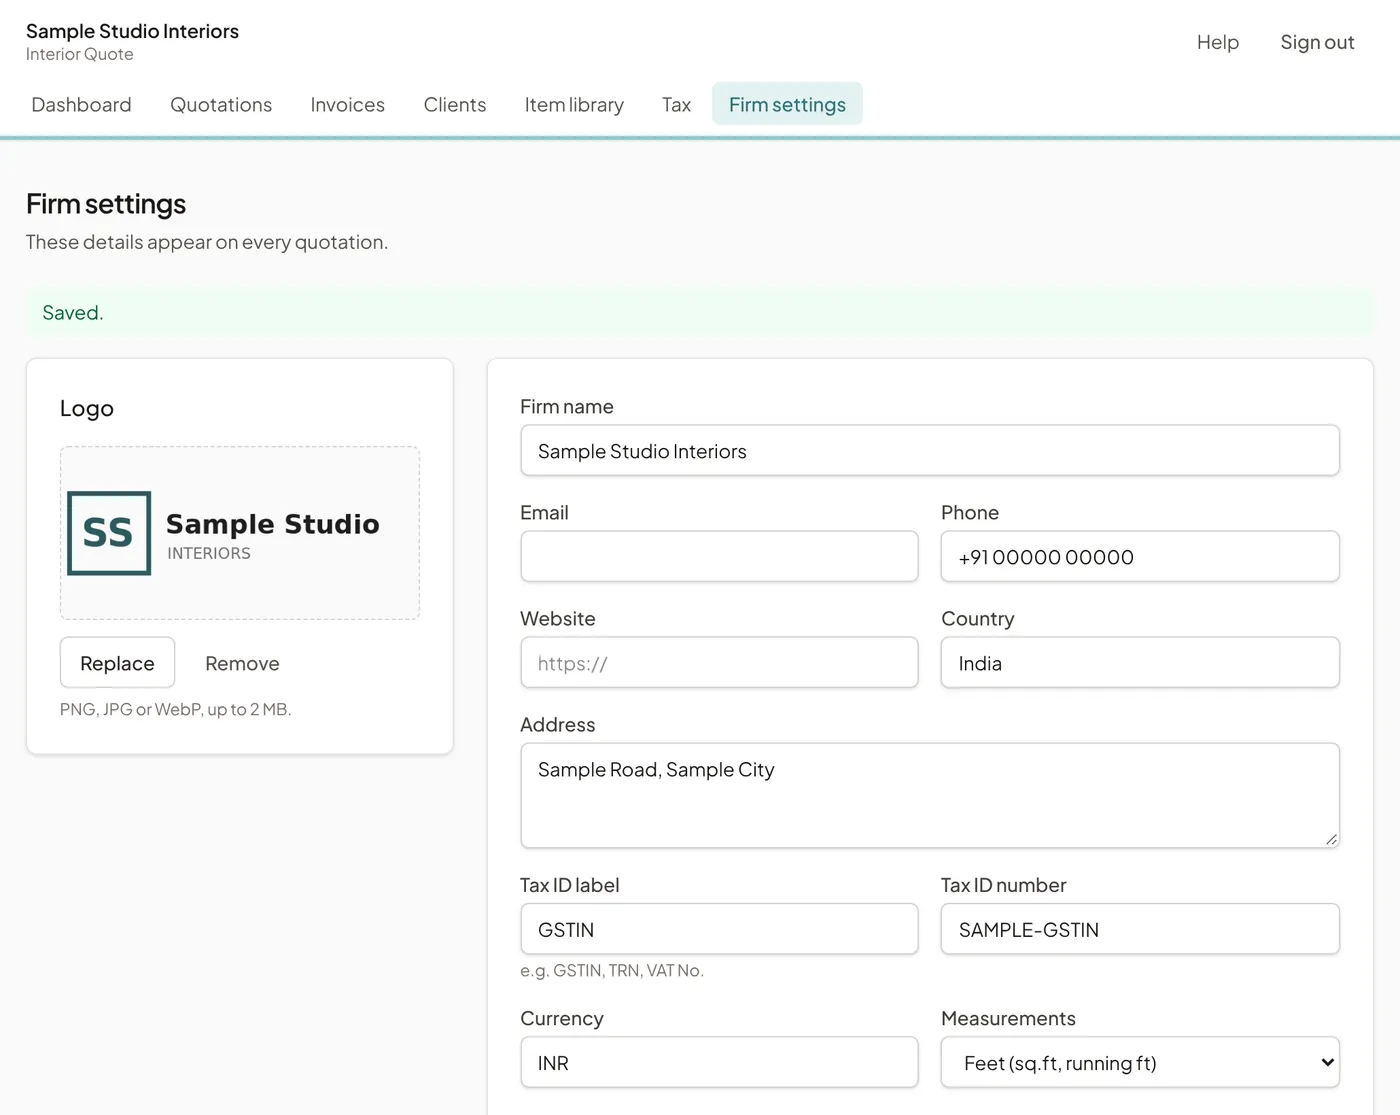
Open Firm settings. Upload your logo (PNG, JPG or WebP, up to 2 MB) and fill in the details you want on every quotation:
- Email, phone, website and address.
- Tax ID label and Tax ID number. The label is what your quotation prints, such as GSTIN in India or TRN in the UAE. Leave both empty if you are not registered.
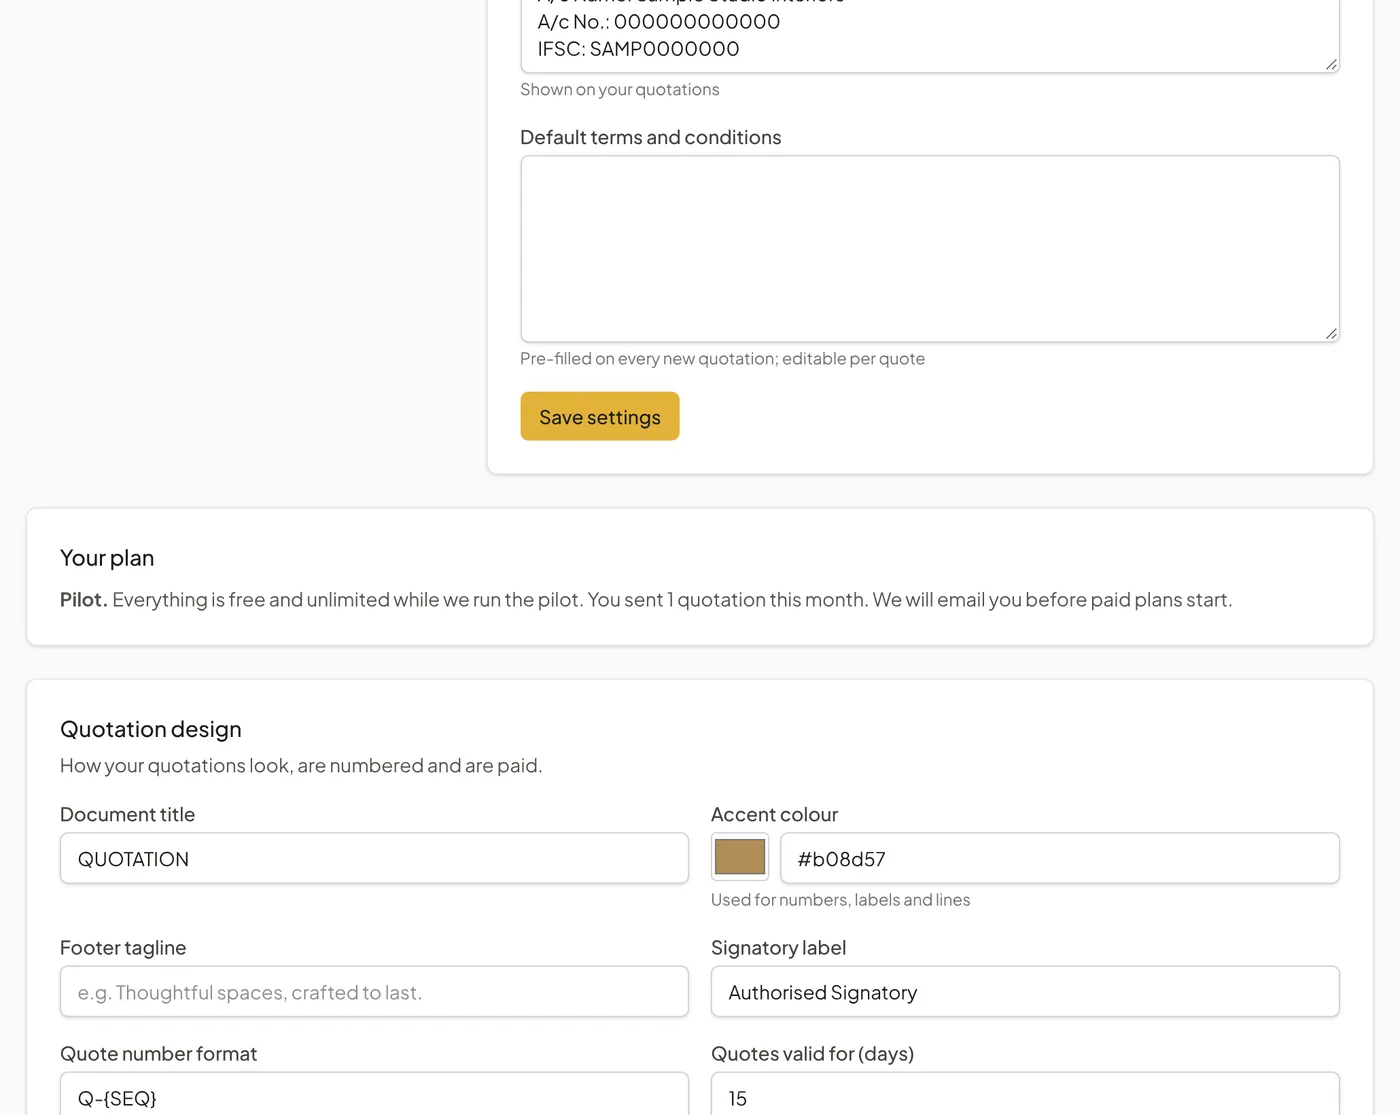
- Bank details, one per line, for example A/c Name, A/c No. and IFSC.
- Default terms and conditions, one per line. They are copied into every new quotation, where you can still edit them for that client.
Choose Save settings when you are done.
4. Design your quotation
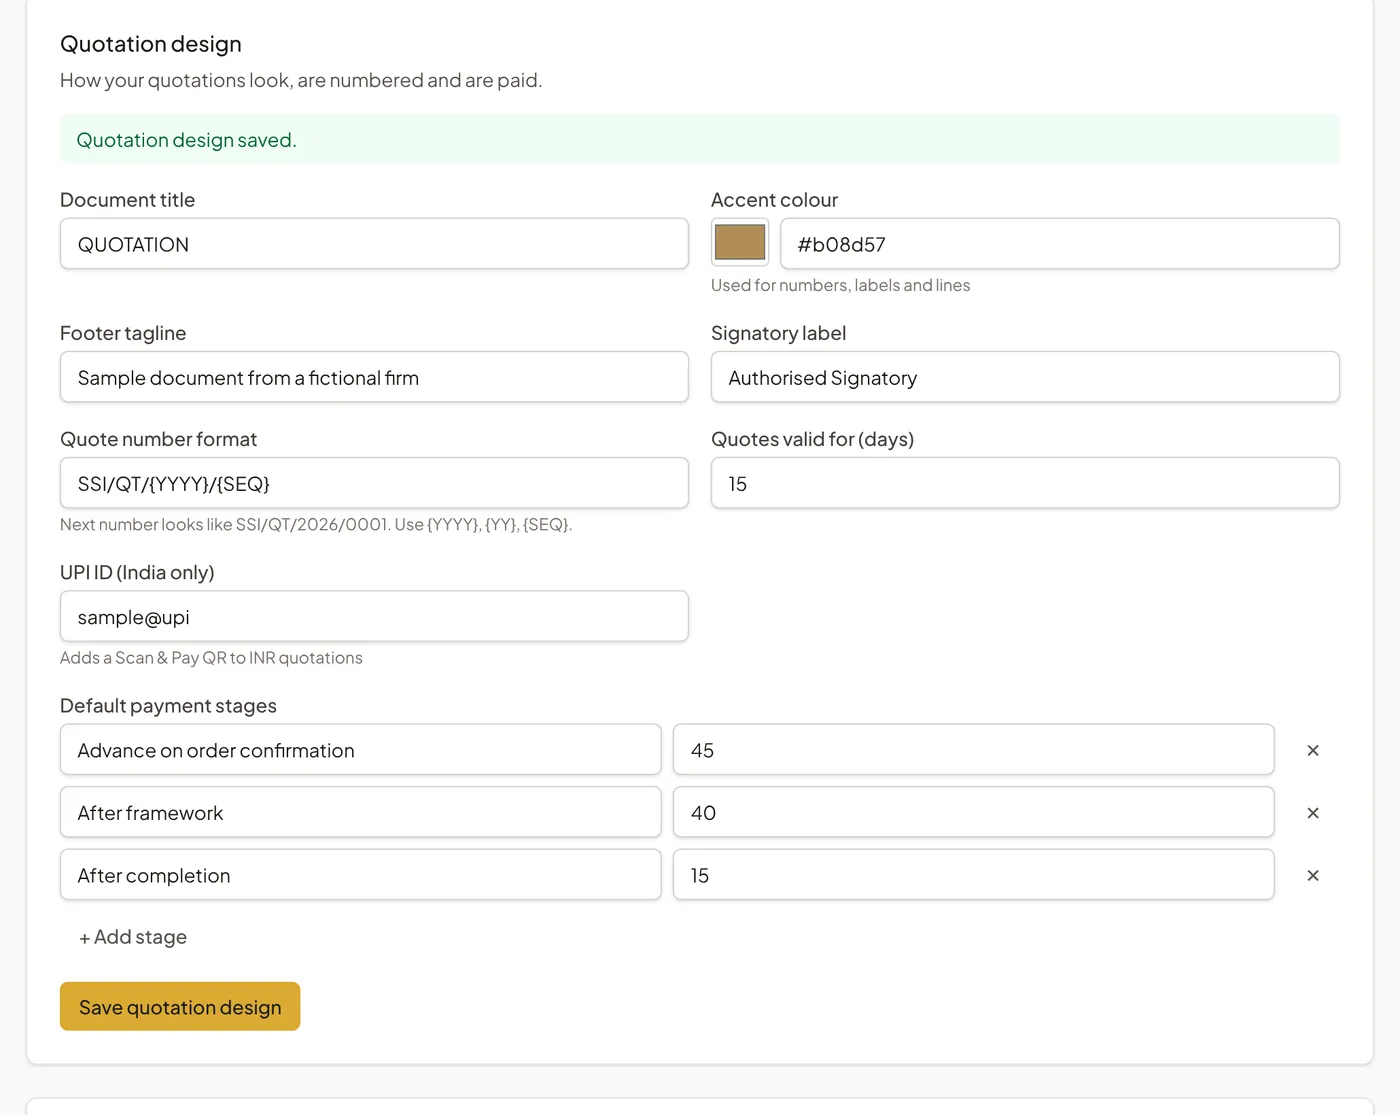
Further down the same page, Quotation design controls how quotations look and are numbered:
- Document title, for example QUOTATION or ESTIMATE.
- Accent colour for numbers, labels and lines.
- Footer tagline and Signatory label.
-
Quote number format. Use
{YYYY}for the year,{YY}for a two-digit year and{SEQ}for the running number.ABC/QT/{YYYY}/{SEQ}gives ABC/QT/2026/0001, then 0002 and so on. The form shows what your next number will look like. - Quotes valid for (days), which sets the Valid till date on new quotations.
- UPI ID (India only). With a UPI ID, rupee quotations show a Scan & Pay QR code your client can pay from.
- Default payment stages, such as 45% advance, 40% after framework and 15% after completion. They must add up to 100%.
Choose Save quotation design.
5. Load your item library
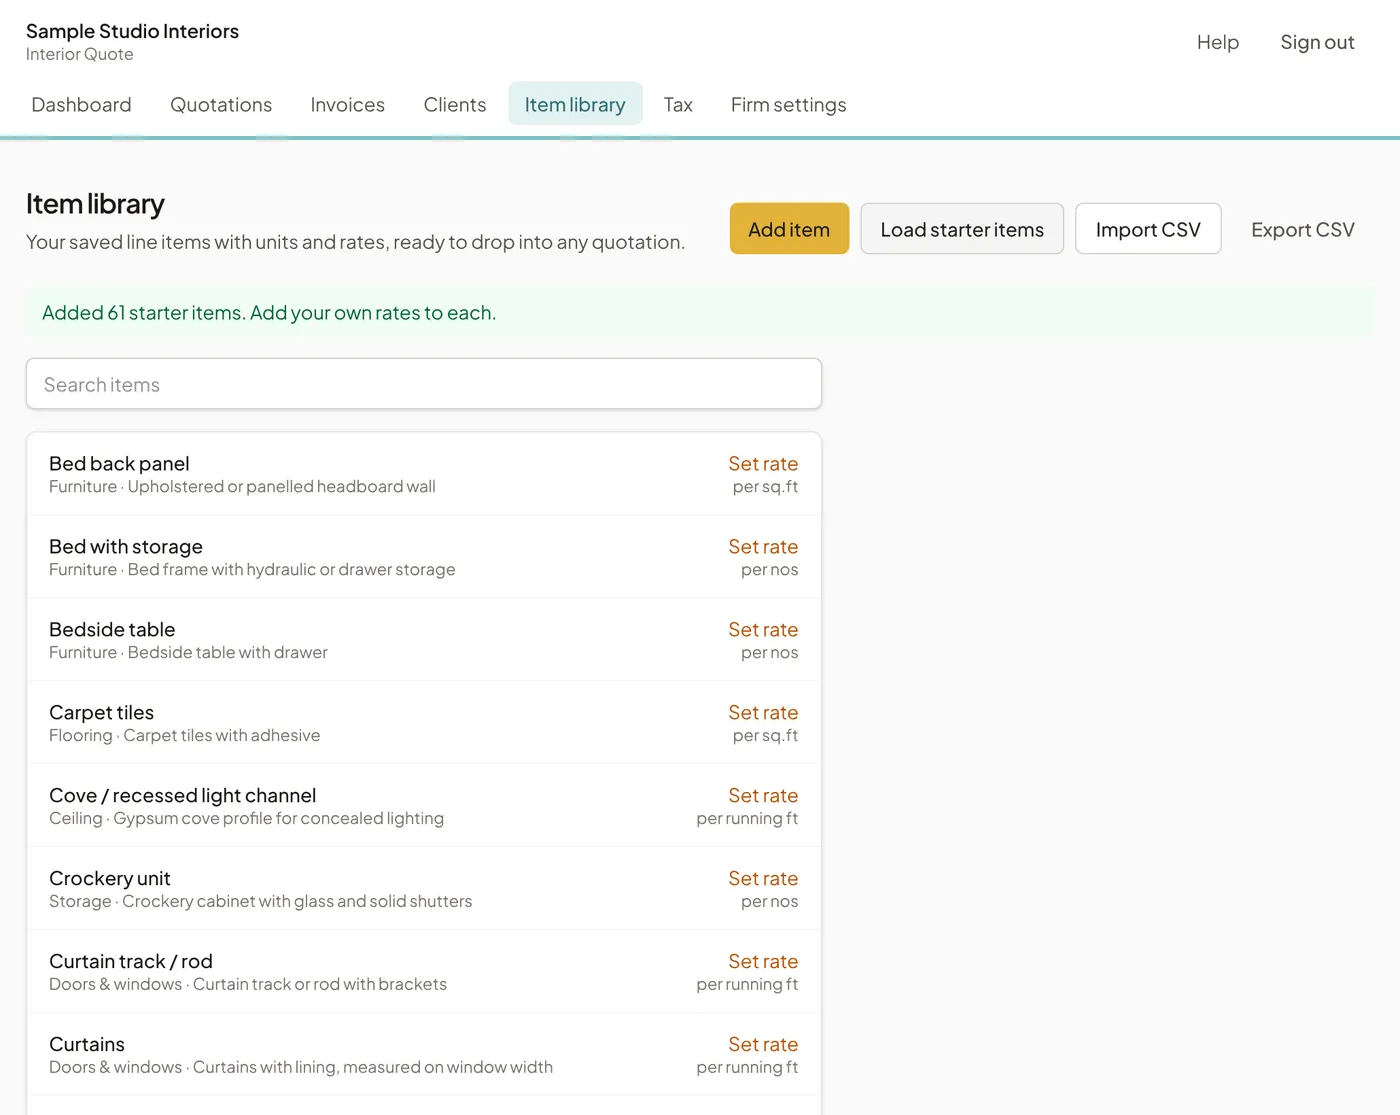
The item library holds the lines you quote again and again, with their units and your rates. In Item library, choose Load starter items to add 61 common interior items, such as wardrobes, kitchen units, false ceiling and cove lighting, with units already set.
Starter items come without prices, because your rates are your own. Items without a rate show Set rate; open one to add your rate, tax profile, the description your client sees and a specification such as material or finish. You can also use Import CSV and Export CSV to manage the library in Excel or Google Sheets.
6. Add a client
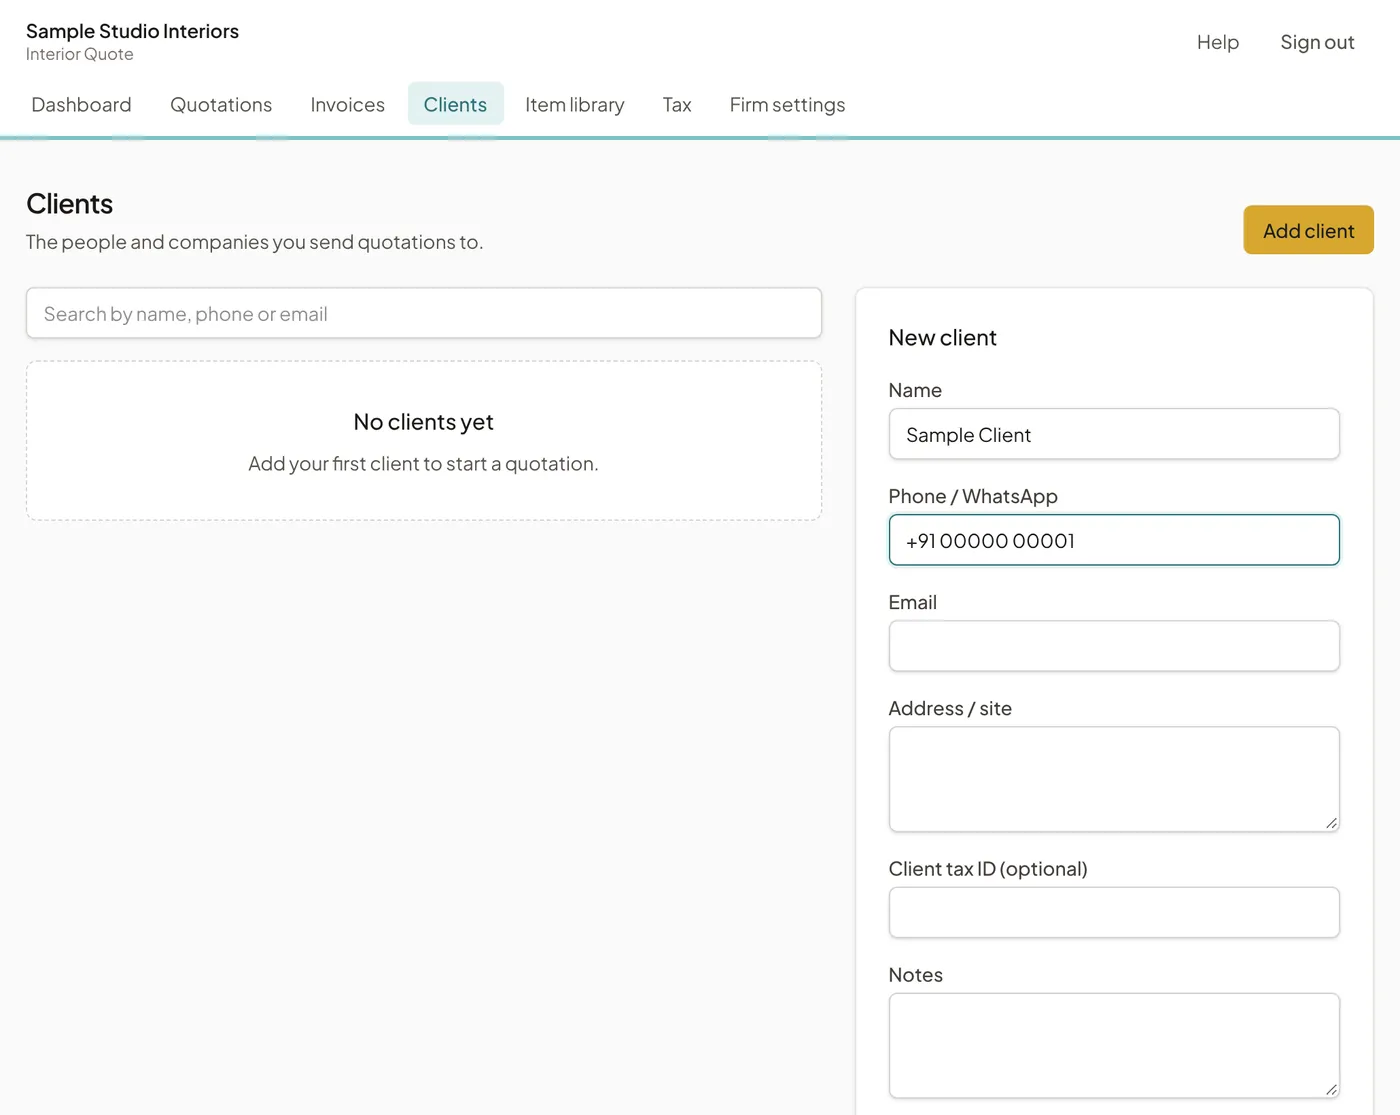
In Clients, choose Add client and enter at least the name. Add the Phone / WhatsApp number so you can send quotations to them on WhatsApp in one tap. If your client is a registered business, add their tax ID; it prints on the quotation.
7. Your plan
Your plan in Firm settings shows which plan you are on. During the pilot everything is free and unlimited, including invoices. After the pilot, the Free plan sends 3 quotations a month with a small “Made with Interior Quote” line on them, and the Pro plan removes the limit and the line and includes invoices. A revision of a quotation already sent that month does not count again. We will email you before paid plans start.
Upgrading to Pro and cancelling
Once Pro is on sale, the Free plan card shows an Upgrade to Pro button with the monthly price. Enter the Mobile number for the payment and approve the monthly payment on Cashfree’s secure page by UPI AutoPay, card or bank mandate. Interior Quote never sees your card or bank details.
When you come back, the card checks the payment with Cashfree and switches to Pro as soon as Cashfree confirms it, usually within seconds. If it says the payment is not confirmed yet, refresh the page a few minutes later. A browser that returns without a confirmed payment never turns Pro on.
To stop paying, choose Cancel Pro. You are not charged again, and Pro stays on until the end of the month you have already paid for. After that, the Free plan applies; your quotations and invoices stay in your account. If a monthly payment fails, the Free plan limits apply until Cashfree collects it.
Outside India, Pro is paid once a year by bank transfer. The card shows how to reach us on email or WhatsApp; we send the price in your currency and our bank details, and switch Pro on when the payment arrives. It shows Paid until with the date, nothing renews by itself, and we email you 14 and 3 days before it ends.
Next
If you charge GST or VAT, set up your tax first. Then create your first quotation.